
I saw a shirt like this online, but the tutorial was difficult for me to follow. I sort of made up my own procedure. I happened to have a gray Shade brand shirt in my closet that I rarely wore... because it's gray and I am not certain "how" to wear it. This little knot improvement really made a nice detail and I love to wear the shirt now.


So, I cut at an angle from the collar hem towards my right underarm area. You can cut as low down the neckline as you wish the knot to be.
Then I decided that I needed to cut two little triangular pieces for me to be able to tie. So, I cut down from the tip of the collar area I had just cut. on both sides of the cut.

And I tied those little triangle pieces.

Then I took one side of the tie and tucked it under and through the hole that formed after I made a knot. See me holding the piece that I just tucked into the the hole and through into the inside area of the shirt?

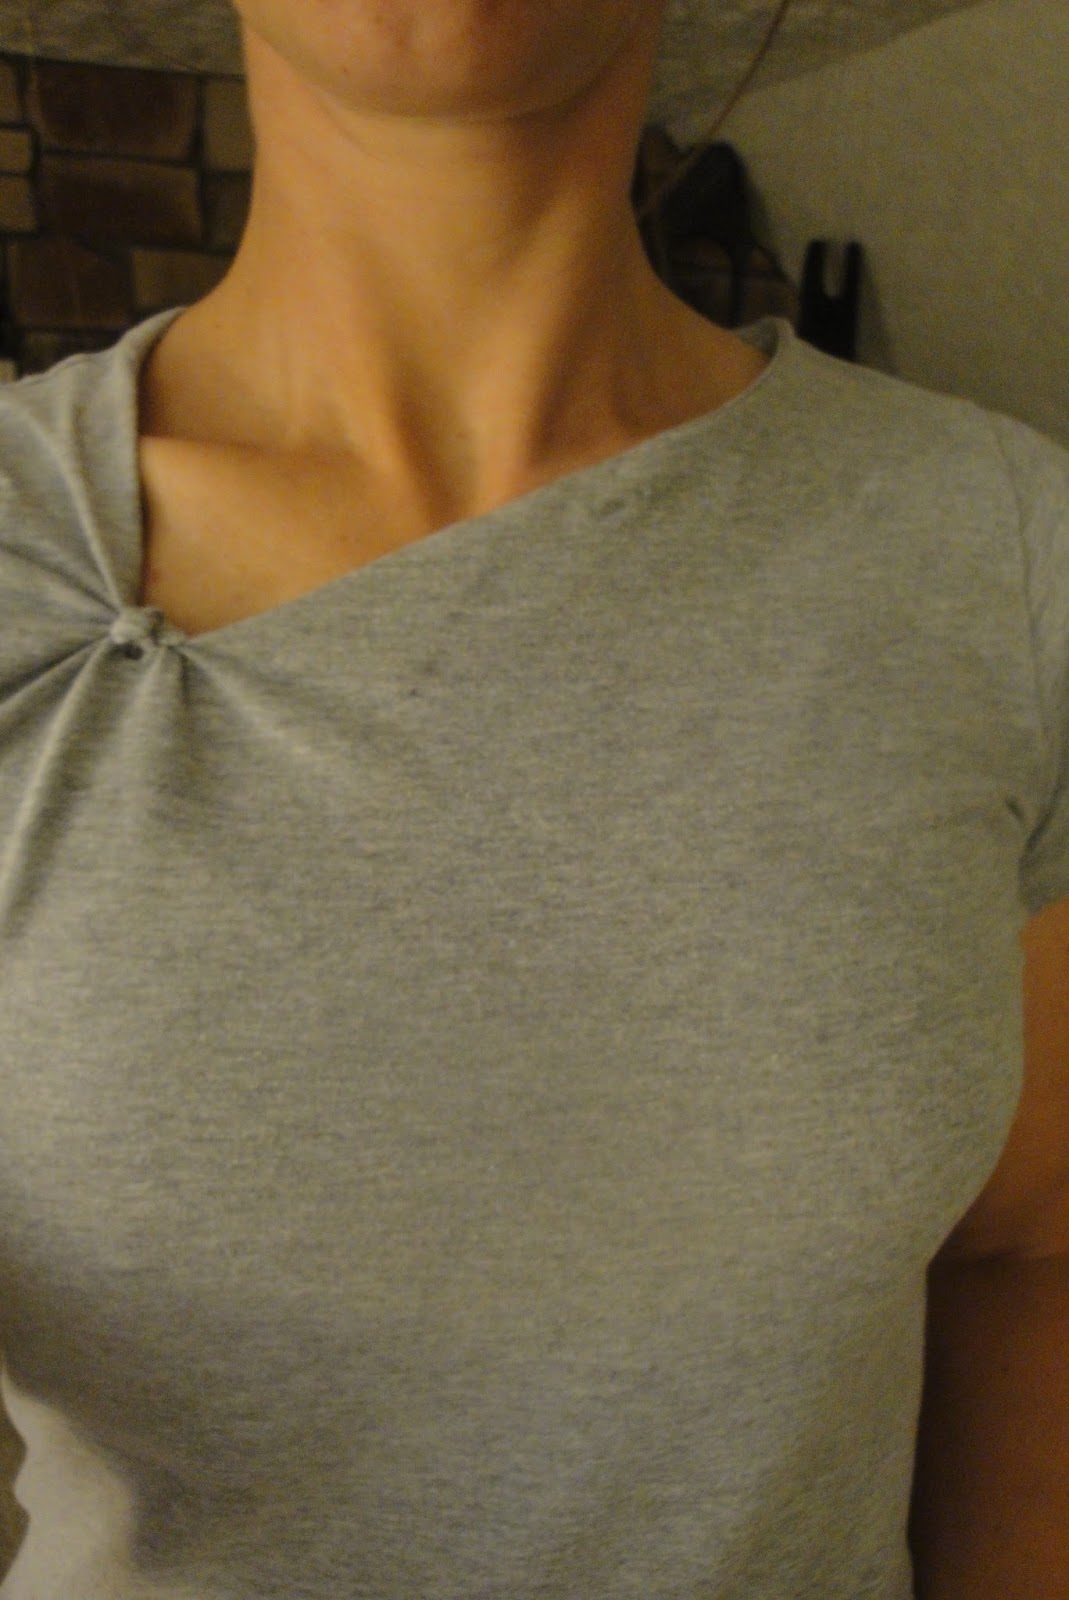
Then I tied those two little pieces again (over the knot).

I cut most of the collar off the front of the shirt because it was too bulky to sew down on the inside of the shirt.

I folded those large flaps of cloth into the inside area of the shirt and laid them flat against the shirt. Then I blind stitched to hem down the flaps against the shirt so it laid smooth. When I blind stiched, I just picked up the slightest bit of cloth so you can't see my stiching from the outside of the shirt.


Here is what the stiching looked like from the inside.


Turn the shirt right side out...Voila!
I was hesitant to try this out, but I used a shirt that I just don't really wear anyway and it made it easier for me to experiment. I am so pleased with the end result! I washed this once in the clothes washer with the rest of my clothes like normal and the stitching and knot held fine. Go find a shirt you rarely wear and try this out! You'll love it!

14 comments:
Thanks for the cute idea. My first try didn't come out exactly right, but it's good enough to turn an uncomfortable shirt I wouldn't wear into something I will. I will try again on another lost cause and see if I can get mine as cute as yours!
I tried this on an old shirt that I had already planned to pass on. I wasn't sure where to begin the cut or how long to make it. The resulting tied knotted was too far toward my shoulder and exposed my bra strap. Did you begin the first cut at the center front of the neck? About how long is your first cut? How wide were your 2nd cuts at the widest point? Thanks!
I think this would look better if the entire neck binding was folded under and stitched by hand. Part of it shows the binding and part doesn't. Just a suggestion!
Great idea the shirt looks awesome I'm going to give it a try
Cut the whole neck binding off. It won't fray much, pull and stretch the neck just a bit and the neck with curl in a funky way that is popular right now.
OMG !! Your are are brilliant Woman, and I like your style..
Looks good, I'm gonna give it a try. Thank you
GREAT JOB! Love It!
Tolle Idee, habe auch Shirts ohne Ausschnitt, werde es ausprobieren
Danke
I check out a whole lot of blog articles, but I never heard a subject like this. I Love this subject you made about the blog writer's container checklist I am sharing a very genuine post to read where you can get to know about best free text-to-speech tool. Please refer article text to speech converter.
Eu não entendi nada. Melhor seria ter vídeo explicando
I know this is a 10-year old post, but thanks for this! Pinterest showed me the original tutorial, and I was also stumped.
I quick addition for those who suggested cutting the neck binding all around: I agree but let's make sure to sew a stay-stitch all around before cutting, just below where one will run the scissors to cut the material, then it will be easy to roll the hem under and sew it by hand with hidden stitches, otherwise the whole neck will get really stretched out, which in my opinion, defeats the purpose of making the knot in the first place.
Your explanation made much more sense! Very cute idea! I will be trying it!
Post a Comment