Showing posts sorted by relevance for query salt crystals. Sort by date Show all posts

Sunday, February 22, 2009


SMMART SCIENCE I : GROW YOUR OWN SNOWMAN


Even if there isn't any snow outside in your front yard...we're making our own snow fun!

Salt Crystal Snowmen can glisten anytime of year! You can use normal table salt (NaCl) for this activity.


You will need:

An adult to help with this

Cardboard tube from kitchen roll or toilet roll

Felt tip pen

Scissors

Salt

Teaspoon

Cup

Shallow dish or saucer


1. Draw a snowman outline on one side of the cardboard tube. (If using a kitchen roll tube cut it in half first so that it’s shorter - after all, who makes a tall thin snowman?) *I let my daughter decorate the snowman with markers


2. Cut around the outline of the top of the snowman making sure that you leave a thin circle of cardboard at the base of the tube. i.e. leave the base intact so that the snowman is supported but from the front you should see a snowman shape. (Be careful when using scissors)


3. Pour 100ml of warm water into a cup. (A tablespoon is about 15ml)


4. Add a teaspoonful of salt and stir till dissolved. *Let your child check the line of the measuring cup to see if you have enough warm water and allow her to dump in the salt and stir.


5. Continue adding salt in this way until no more will dissolve and you have some salt left at the bottom of the cup. This is known as a saturated solution.


6. Pour the solution into a shallow dish or saucer and stand the snowman in it.


7. The solution should slowly start to rise up the cardboard. Now leave the whole set-up in a safe place for a few days.


What's happening? The salt is dissolved in the water to form a saturated solution. As this solution starts to travel up the cardboard snowman the water evaporates leaving behind salt crystals. In time your snowman will look as if he is glistening! As more salt solution travels through the cardboard it allows the small salt crystals to grow even bigger.


*I have also had success from boiling 1 cup of water and adding 1/4 cup of salt, stirring, and perhaps adding a little extra salt until the solution is super saturated. Boiling water (heat) helps to break the salt's ionic bonds and dissolve the salt into solution.
Lisa

Sunday, March 1, 2009


SMMART SCIENCE II: SALT CRYSTAL SNOWFLAKES

.
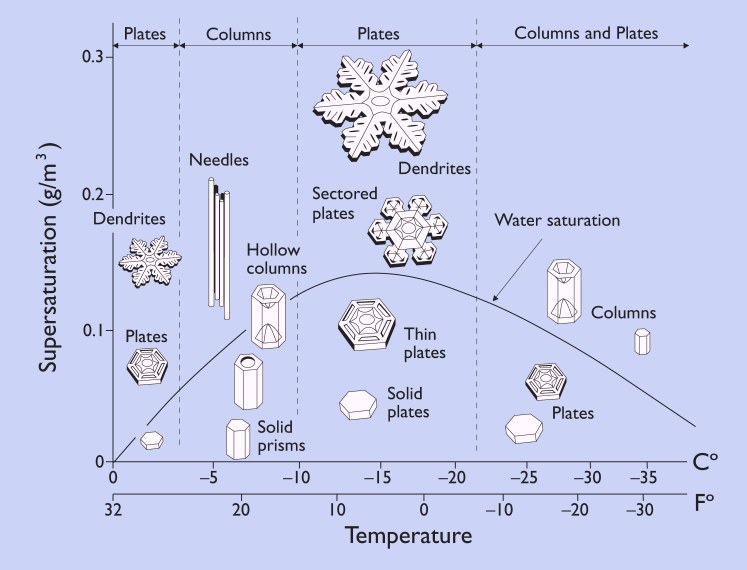
Snowflakes fall to the ground in 6-sided crystals. There are basically 6 different types of snow crystals: needles, columns, plates, column with capped plates, dendrites and star. To see pictures of these crystal shapes you can check out: http://snowflakebentley.com/snowflakes.htm

.
You can find more information about the 6 different snow crystal shapes at:
.


SALT CRYSTAL SNOWFLAKE:
.
This activity gives you a great visual model of what a 6-sided Star Snowflake Crystal looks like.
.
You will need:
1 cup boiling water in a pot
Salt
Pipe cleaners and cotton string

.
·
Dissolve ¼ cup salt in 1 cup of boiling water. You want to make sure there are salt crystals that do not dissolve that are sitting on the bottom of the pot. You are creating a supersaturated solution where the water cannot dissolve any more salt.


· Twist three pipe cleaners together to make a six-armed star.


· You need to tie cotton around one of the arms then suspend it in a jar full of a saturated solution of salt or sugar.


· Make sure that your star is fully immersed in the solution but not touching the bottom of the jar.


· Try adding food coloring to the solution if you’d like a colored star.


You can also use 3 cotton pieces of string, tied together in a knot in their middles. Wet the strings in the supersaturated solution. Fill the bowl with the supersaturated solution and drape each free end over the edge of the bowl in the shape of a star. Be sure to put a paper towel under the bowl for any drips. Leave the string alone for a few days and see what forms along the cotton arms.


Lisa


Monday, February 21, 2011

  SMMART SCIENCE:
ICE and SALT ACTIVITIES

Has your child noticed that sometimes there is salt sprinkled on the ground to melt the ice in the wintertime? Well, salt plays a magical role in these great learning activities.
.
First, to establish a little background with your child, you might wish to set out two plates of crushed ice. Let your child sprinkle salt on one plate of ice and observe together which plate of ice melts first. Now your child will see that salt helps ice to melt.

This is because the sodium and chloride ions from the salt intermingle and dilute the water molecules. This makes it harder for the water molecules to join together to form ice crystals. Actually, it's still possible for the water molecules to form ice crystals, but now instead of freezing at 0°C, it's freezing point drops to below 0°C.
SMMART SCIENCE: MAGIC ICE

Now, for the activity, Fill a small glass with water and ice cubes. Give your child a piece of cotton string or yarn about a foot long. Let your child hold both sides of the string and rest the remaining middle part of the string on top of the icecubes. Take care to leave the ends of the string hanging over the edge of the glass.

Have your child count to 15. Now instruct her to take both ends of the string and pick it up, while lifting up a piece of ice with the string. The string is not attached to the ice and will not lift the ice.

Now, have your child lay the string back onto the ice with the ends of the string laying over the sides of the glass. Have your child sprinkle salt all along the string laying on the ice. Now count to 15 slowly.
Ask your child to pick up the ends of the string and try to pick up the pieces of ice now. Voila! 
SMMART SCIENCE: Color Ice Sculptures
Fill a disposable paper cup, cardboard milk carton, or other container with water and freeze over night. Let your child help you remove the ice from the container and place it on a cookie sheet to catch the melting ice water. Let your child sprinkle rock salt onto the ice and observe the ice melt more rapidly.

Check out the reason that the salt melts the ice more quickly at http://antoine.frostburg.edu/chem/senese/101/solutions/faq/why-salt-melts-ice.shtml.  This site has a fun, interactive demonstration when you click “Add Solute” that further demonstrates this principle.
.

Now help your child drip drops of food coloring onto the top of the ice. The food coloring seeps through the cracks of the ice. You’ve created a beautifully colored, melting ice sculpture. Quick! Snap a picture before it melts away! (http://www.placeofourown.net/activity.php?id=137)
 

Sunday, December 12, 2010

SMMART SCIENCE: MAGIC ICE

Has your child noticed that sometimes there is salt sprinkled on the ground to melt the ice in the wintertime?  Well, salt plays a magical role in this great learning activity.

First, to establish a little background with your child, you might wish to set out two plates of crushed ice.  Let your child sprinkle salt on one plate of ice and observe together which plate of ice melts first.  Now your child will see that salt helps ice to melt.

This is because the sodium and chloride ions from the salt intermingle and dilute the water molecules.  This makes it harder for the water molecules to join together to form ice crystals.  Actually, it's still possible for the water molecules to form ice crystals, but now instead of freezing at 0°, it's freezing point drops to below 0°C.

Now, for the activity,  Fill a small glass with water and ice  cubes.  Give your child a piece of cotton string or yarn about a foot long.  Let your child hold both sides of the string and rest the remaining middle part of the string on top of the icecubes.  Take care to leave the ends of the string hanging over the edge of the glass.

Have your child count to 15.  Now instruct her to take both ends of the string and pick it up, while lifting up a piece of ice with the string.  The string is not attached to the ice and will not lift the ice.

Now, have your child lay the string back onto the ice with the ends of the string laying over the sides of the glass.  Have your child sprinkle salt all along the string laying on the ice.   Now count to 15 slowly.

Ask your child to pick up the ends of the string and try to pick up the pieces of ice now.                       
The salt caused the ice under the string to melt slightly.  Then the cold water aids that thin bit of melted ice to refreeze.  Since the string has soaked up water, it freezes to the ice cubes.  Ice crystals reform, trapping the string.  Now your child can pick up the ice cubes along the string like a necklace.

LinkWithin

Related Posts with Thumbnails