Monday, April 16, 2012


SMMART SCIENCE: EGGSPERIMENTS
Got some extra eggs around after the Easter Holiday?  Try out these fun experiments...
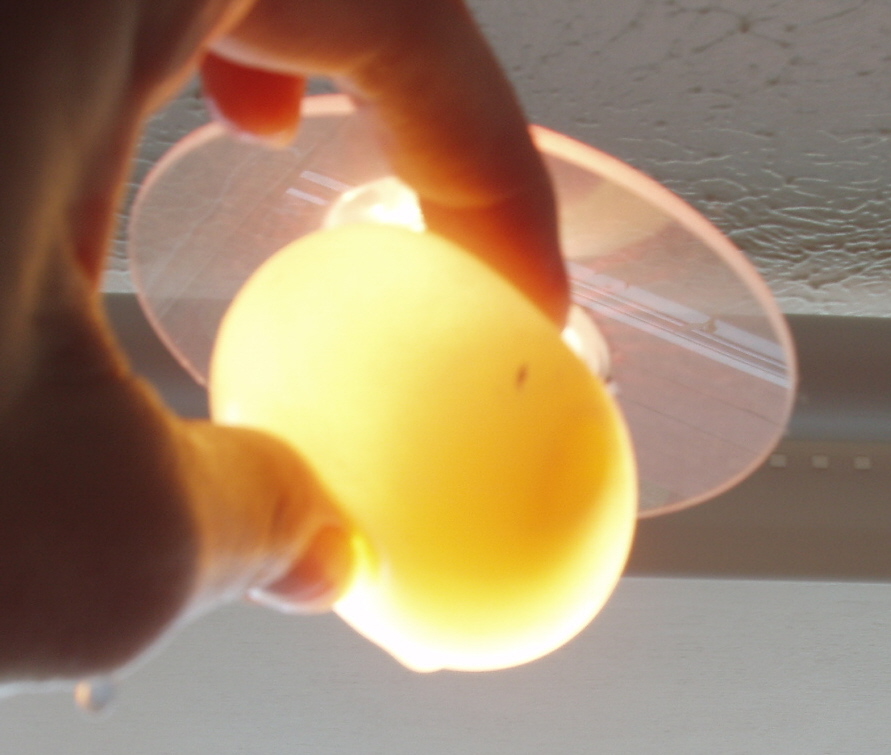
First, observe "the egg".  The architecture of an egg is amazingly strong.

Here you see an electron microscopic view of the hen eggshell; three layers of calcium carbonate.(http://www.csun.edu/~mk411573/discrepant/discrepant_event.html) 

Is a boiled eggshell weaker than a fresh eggshell?  "When shell eggs are hard cooked, the protective coating is washed away, leaving bare the pores in the shell for bacteria to enter and contaminate it."  Does this leave the boiled eggshell structurally weaker? (http://www.fsis.usda.gov/Fact_Sheets/Focus_On_Shell_Eggs/index.asp)

Try squeezing a fresh egg with your fist.  You'll have a hard time cracking it.  Try now with a boiled egg...does the boiled egg crack more easily?

RUBBER EGG

You will need:
Tall glass
White vinegar
Raw egg


Let your child carefully place a whole raw egg (intact with the shell) into a tall glass. Have your child pour white vinegar to cover the egg in the glass. Let the egg sit 2 days (
http://www.stevespanglerscience.com/experiment/naked-egg-experiment shows a procedure that involves changing the vinegar and letting it sit for 7 days).

Observe the tiny bubbles that come off of the egg shell. After two days observe how the egg shell dissolves (rinse off the white egg shell residue) and the remaining egg membrane is soft and translucent.

"The bubbles are carbon dioxide gas. Vinegar is an acid called acetic acid - CH3COOH - and white vinegar from the grocery store is usually about 5% solution. Egg shells are made up of calcium carbonate. The vinegar reacts with the calcium carbonate by breaking the chemical into its calcium and carbonate parts (in simplest terms). The calcium part (free ions of calcium float around in the solution) while the carbonate part reacts to form the bubbles that you see. Some of the vinegar will also sneak through the egg's membrane (permeate the membrane) and cause the egg to get a little bigger. That's why the egg is even more delicate if you handle it. If you shake the egg, you can see the yolk sloshing around in the egg white. If the membrane breaks, the egg's insides will spill out into the vinegar. Yes, you've made a pickled egg." (
http://www.stevespanglerscience.com/experiment/naked-egg-experiment)

Enjoy these two activities with your child and think about this last eggsperiment if you dye Easter eggs with a dye kit that requires the use of vinegar.  

You have got to check out this fun bunch of research scientists at the U of Nottingham!  Look at all the fun you can have with a Cadbury Creme Egg...
Lisa

Sunday, April 15, 2012

SMMART SCIENCE:
Sink or Float

Okay, quick...If you drop a boiled egg into a glass of water, will it sink or float?  Now, what if you drop a fresh egg into water?  Sink or float?  (Both fresh and boiled eggs will...sink!)

So, now have your child pour a few Tablespoons of salt into the water with the fresh egg in it (count the number of Tb).  The salt makes the water more dense than the egg...and voila!  Floating egg!

Now, how many Tb does it take to make a boiled egg float?

EGG VACUUM
You will need:
Boiled egg
Glass bottle with narrow opening just smaller than the boiled egg
birthday candles
match or lighter

Place two birthday candles in the top of a boiled egg.  Light the candles and hold the bottle over the candles to heat up the air a little bit.  Now place the bottle on top of the candles.  The fire will burn out the oxygen from the bottle, creating a lower pressure area and a vacuum will form.  Up goes the egg, sucked up into the bottle!  (http://kitchenpantryscientist.com/?tag=egg)

Monday, April 9, 2012

SMMART READING:
Letter Cookies

I Love these letter cookies from Winco Grocery store... and I loathe them...

I happened into Winco Grocery Store (not in my neighborhood) and found these awesome cookies.  
Yes, of course, they are a great motivation for little letter learners to tell me the letter sounds. 
Yes, of course, they cause a whimsy and excitement in my little spellers to create and spell words for a nice chunk of time...cookie letters spread out on the little table and magically being molded into words. 
Yes, of course, they make for fabulous school treats tucked lovingly into my daughter's lunch bag. The message is written in permanent marker on a snack-size plastic bag and she gets to spell out the message of love or encouragement before she eats them.

But the problem is... they also taste really good...

I am tempted to make the 30 minute drive back to the store since our cookie stash is mysteriously low.

Monday, April 2, 2012

SMMART ART:
Cascarones
My daughter brought home a little book for reading practice, called Cascarones are Fun!  Since Easter is approaching, we thought this would be a perfect activity for our "formal" monthly art class.  Aprons on!
It seems that Marco Polo brought the first cascarones from Asia.  They were filled with powder or spices.  Now they are filled with confetti and small toys.  They are to be cracked open over someone's head.  Cascarones are fun for holidays and celebrations. 
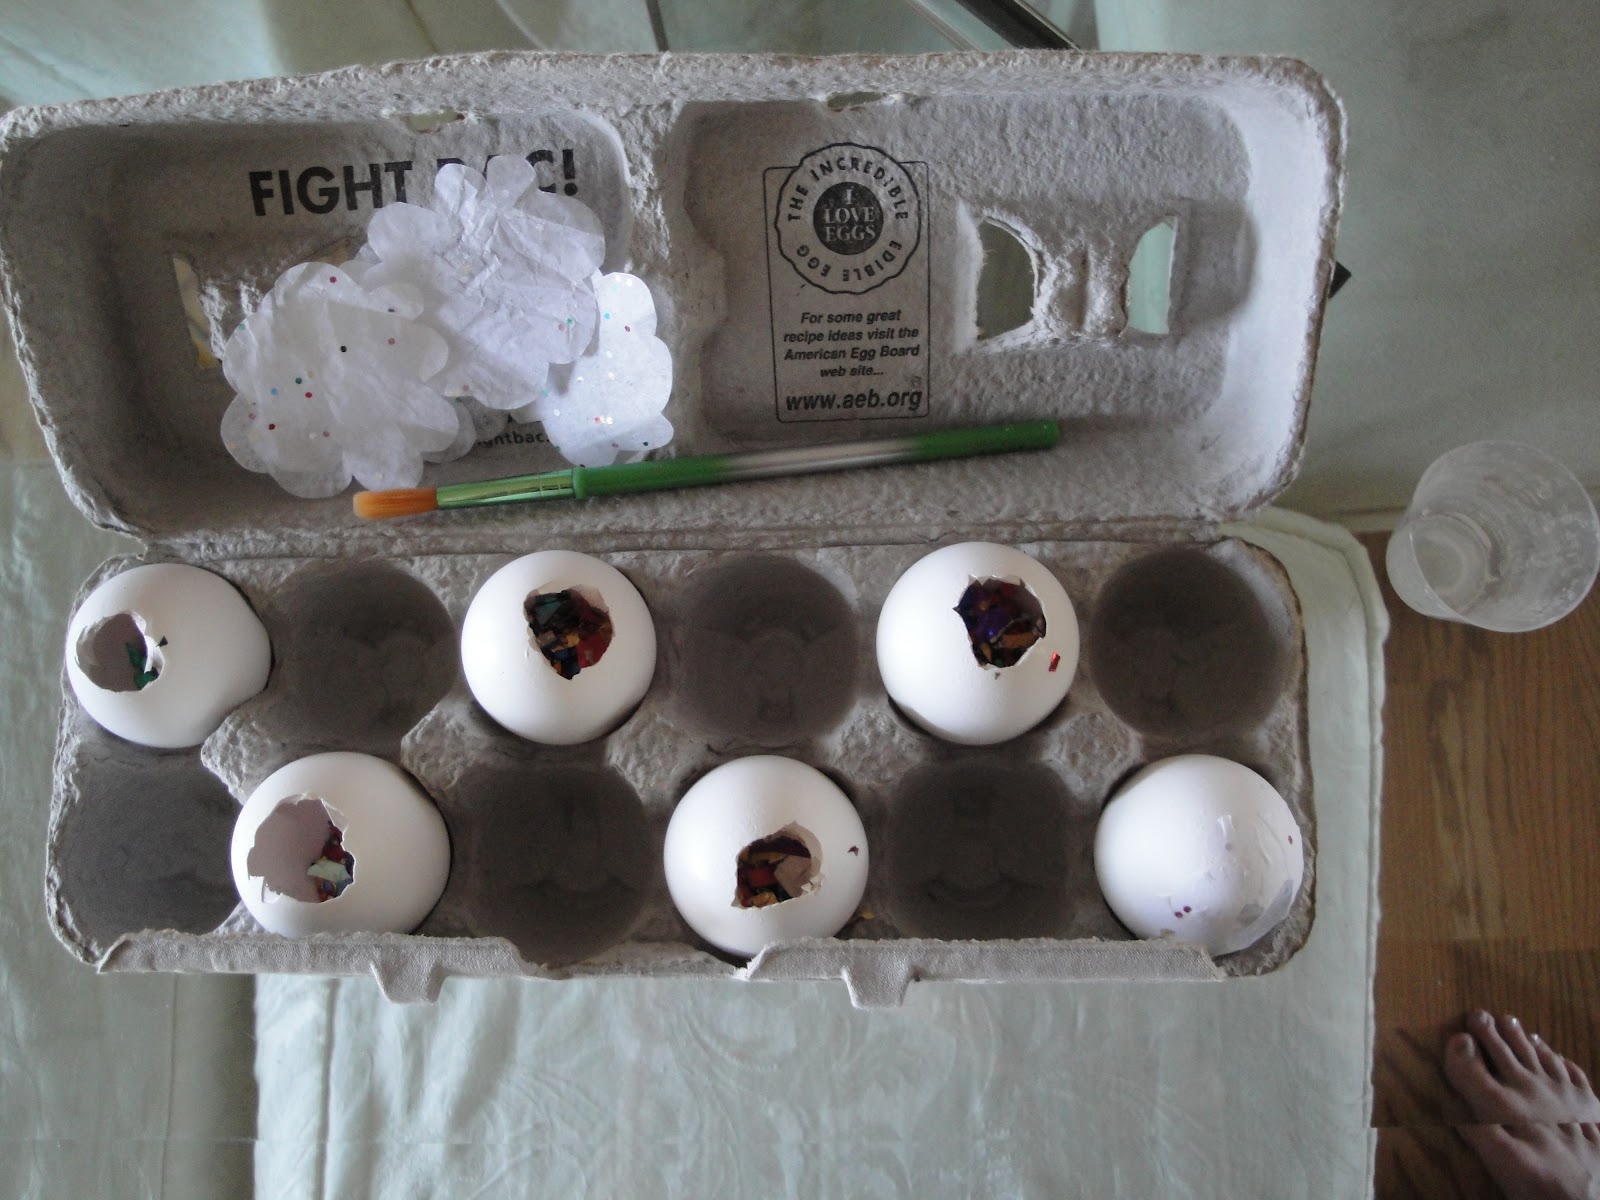
First we tapped holes throught the eggshell on the bottom of the eggs.  Then we shook out the white and yolk into a bowl.  We rinsed the inside of the eggs and let them dry.  Fill the insides of the eggs with confetti.  Using a small paper wrapped into a funnel made the egg filling a lot easier.
Cut out small pieces of tissue paper that are large enough to cover the hole in the shell.  Brush a glue wash onto the perimeter of the shell hole and place the tissue paper on top.  Brush the tissue paper down with glue wash to keep the paper on the egg.  Let the hole-covered-eggs dry.
Make a Cascarone work-station by placing the dried eggs into an empty egg carton, place a brush in the lid and a small cup of gluewash beside carton.  Place any desired embellishments inside the carton lid.
We cut down the carton pockets to make a stand for our cascarones while they were being embellished.
Now, decorate your Cascarones with glitter and glue, tissue paper hearts, sequence and jewels.  You can even make your own Cascarones Character!
We are going to hide our Cascarones for our family Easter Hunt and then crack 'em open!

Tuesday, March 27, 2012

SMMART TIME-OUT:
Easter Huntin' Handles

If you are headed to a big hunt, then you may be wondering what bag to bring along for your hunter.  Traditional Easter baskets don't hold many eggs and are too shallow, so eggs easily fall out of them when bending down to retrieve another egg.  Plastic grocery bags offer great capacity, but you have to open them each time you add an egg.

How about this little grocerybag Easter Egg Huntin' "handle"?  The handle is an easy grip for youngins and stays open, while preventing spills.  If you are amazing at hunting and fill your bag, you can release the filled bag and swap for a new bag.
Find a thin, cardboard box (pasta, babyfood cereal, juice carton...) and cut off the bottom and top flaps so that you now have a retangular tunnel of box front, box back, and two box sides.
Cut the top part of the sides off.  You'll want to leave at least 3-5" of the bottom of the box sides.  If you want to reinforce the handle, fold the top of the box front (and then back) down in half-ish.  Now you can poke a hole into the upper part of the box front and cut out a large rectangle (leaving 3-5" of space left at the bottom, like you left on the sides.)  Create a handle.  Tape the bended flap down to make a secure handle and you may wish to tape around the fingerhold area too.
Slide a grocery bag through the center of the Easter Huntin' Handles and slip the grocery bag handles over the Easter Huntin' Handles.  Pull down on the grocery bag to make the bag snug over the handles.  If the handles are too big and not snug, just snap that handle in half and tie it over the Easter Huntin Handles.

If you wish, you can spray paint the handles to cover over the box print.  Then let your child color it with markers, cover it with Easter stickers, or paint the Easter Huntin' Handles.
Happy Huntin'!
                                                                                                                                                                                                                                                                                                                                                                                                                                                                                                                                                                                                                                                                                                                                                                                                  

Wednesday, March 21, 2012

SMMART SCIENCE:
"Cloudy, Cloudy Day"
Cloud Categorizer

I found a really cool cloud identification "weather window" on www.nature-watch.com.  Being the frugal lady that I am, instead of buying this handy-dandy hand-held devise of wonder...we made our own Cloud Categorizer.  (Thanks to http://www.weatherwizkids.com/weather-clouds.htm for the great cloud photos!)

Make your own Cloud Categorizer:
We used the cardboard from a cereal box.  Print the cloud photos from the PDF below and cut out the rectangles.  Make sure you cut out the center rectangle.  Now tape or glue the cloud photo rectangle to the cardboard.  Cut around the photos (and be sure to cut out the center rectangle).   Tape a handle (one or two tongue depresors, plastic spoons...) onto the bottom of your cardboard frame. 
CloudCategorizerPDF

Or you can cut out your own cardboard frame and find pictures in magazines, or print pictures from online to identify the various cloud types.  Cut out the pictures and tape them to your cardboard frame. 
Peek through your window to see the clouds in the sky.  Do the clouds in the sky outside look like some of the clouds on your Cloud Categorizer?
Explain to your child how clouds are formed.  Water vapor condenses into the liquid (water) or solid (ice) form.  Little tiny water droplets are formed when the vapor condenses around a tiny dust particle in the air.  A cloud is a collection of MANY tiny droplets in the air. 
There are basically three types of clouds:
1. Cirrus ("curl"): thin wispy and white. They are located high in the sky and are almost entirely made up of ice particles. These types of clouds often are seen before rain or snow.
2. Cumulus ("heap"): white, fluffy and round. They are seen on nice days.
3. Stratus ("layer"): low hanging clouds that are in layers that look like a gray blanket. They look like haze in the sky. These types of clouds can become fog if they get low enough in the air. 

The word Nimbus means "rain", so: 
Nimbostratus: dark clouds that normally are seen when rain or snow is happening all day long.
Cumulonimbus: tall vertical clouds. Often called thunderheads. They usually produce lightening and storms. (http://www.lessonplanspage.com/ScienceTypesCloudsHowFormedUnit2.htm)
Keep your Cloud Categorizer handy to predict the weather!  Check out how the clouds on your Cloud Categorizer can tell you what type of weather lies ahead:  http://www.weatherwizkids.com/weather-clouds.htm.
Happy Cloud Watching...
Oooh, I think I see a cloud that looks like an elephant!

Monday, March 5, 2012

SMMART Science:
St.Patrick's Day
Green Cabbage Juice

Cabbage isn't just nice with a helping of Corned Beef!  Use purple cabbage juice as a pH indicator to tell you if a substance is acidic or basic.  Purple cabbage, tumeric, and beetroot are just a few natural plants that contain anthocyanins.   Anthocyanins are members of the flavonoid group. In an acidic solution there are lots of hydrogen ions and the addition of hydrogen ions to the anthocyanins alters the wavelength of light that is reflected by the molecules. (www.ilovebacteria.com)
.
You can easily test the pH (amount of Hydrogen ions) in substances around your house.
-Cut a head of purple cabbage in half. 
-Chop up the cabbage half into about 2 cups of chopped cabbage and put it into a large bowl (lid optional). 
-Pour boiling water over the cabbage until the cabbage is covered.  If you like, you can cover the bowl to keep the water nice and hot. 
-Let the cabbage seep for 10 minutes.  The water will turn a nice purple color. 
-Remove the cabbage and keep the purple liquid.
-Pour a little purple cabbage juice into several little bowls.
-Slowly add a substance to the cabbage juice in a little bowl and observe the color change!
Purple color= Neutral= pH7
Red color= Acidic
Green/blue color= Basic

The pH scale goes from 2(highly acidic) to 14(highly basic), with 7 in the middle being neutral

Try testing lemon juice, vinegar, soda, milk, laundry detergent, and household bleach.
http://chemistry.about.com/od/acidsbase1/a/red-cabbage-ph-indicator.htm
SUBSTANCEpH VALUE
Freshly squeezed lemon juice2.5
Vinegar2.8
Freshly squeezed orange juice3.0
Tomato Juice
Bottled Lemon Juice
4.0 to 4.5
Black Coffee5.0
Detergent6.5
Milk6.8
Water7.0 (neutral)
Seawater8.0
Baking soda9.0
Milk of Magnesia10.7
Domestic Bleach 11.0
Chocolate, honey, molasses, sour cream, buttermilk, brown sugar, natural cocoa powder, etc.mild
http://baking911.com/learn/ingredients/other

Add a little baking soda to the red (acidic) cabbage juice and watch the baking soda neutralize the acid to a purple.
Is Soda Good for your bones?

Test your favorite soda...is it acidic?  Soda can cause your body to pull Calcium from your bones to neutralize the acid.  This may contribute to osteoporosis.  Some experts suggest that if a person has a healthy diet, this really isn't a problem.  Others say that some people fill up on soda throughout the day and don't have a healthy diet.  These are the people who may be more at risk of osteoporosis from drinking carbonated beverages.

Friday, March 2, 2012

SMMART ART:
Origami

Origami was passed on through oral tradition for many years in Japan. Ori=paper and gami=folding. Origami has traditions in the Arab world, Spain, China and South America. Since it was Valentine's Day recently, we formed a very simple Heart Origami. You can find detailed photo directions at http://www.origami-instructions.com/easy-origami-heart.html
Then we created easy lotus blossoms. You can find the detailed photo directions at http://www.origami-instructions.com/origami-lotus-blossom.html

I thought it might be fun to learn napkin origami that our kids could use when they set the dinner table. You can find an amazing variety of napkin art online. We did a few simple designs:
http://www.napkinfoldingguide.com/24-lily/ and
http://www.marthastewart.com/272599/three-easy-napkin-folds

LinkWithin

Related Posts with Thumbnails